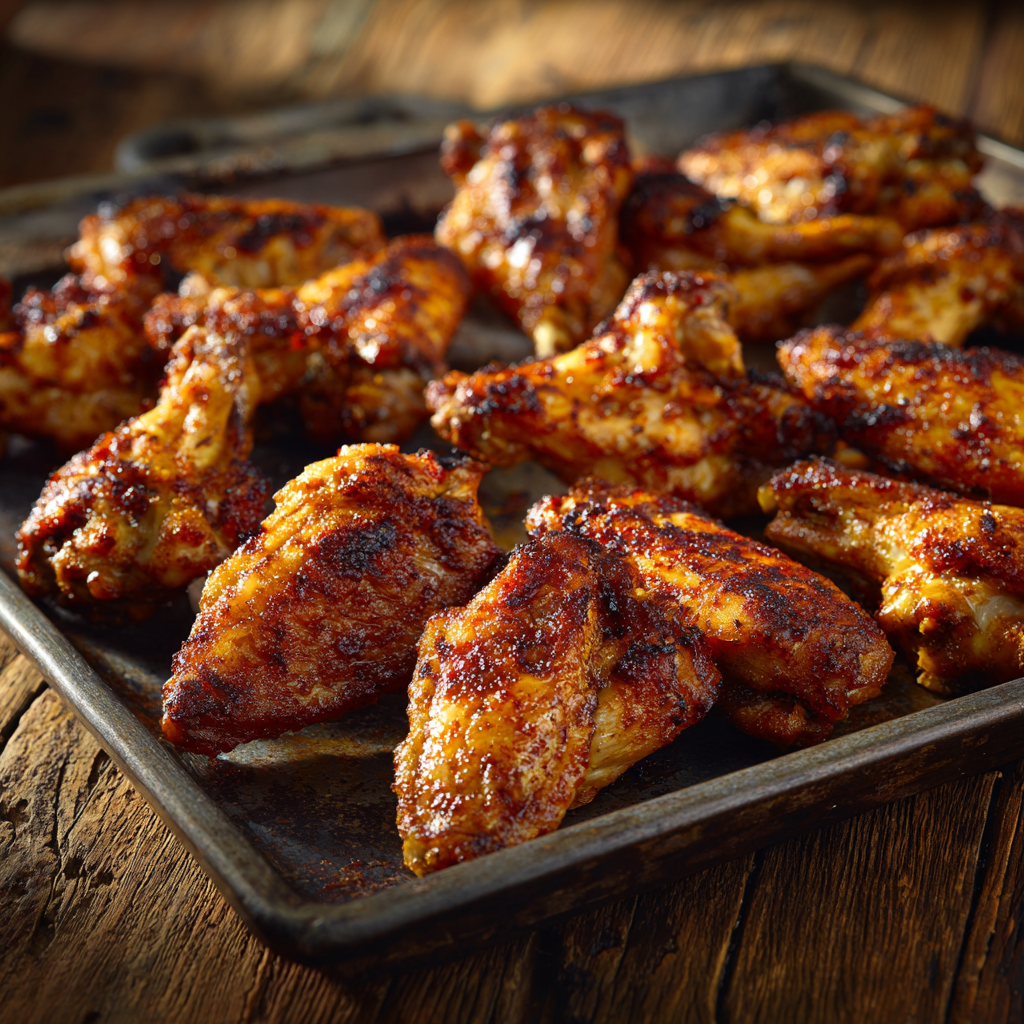
Crispy baked chicken wings are the perfect combination of convenience, flavor, and irresistible crunch. They deliver all the satisfaction of classic fried wings — the golden skin, the juicy meat, the bold seasoning — but without the mess, oil, or guilt that comes with deep frying. Whether you’re making wings for game day, a family dinner, a party appetizer, or a quick weekend meal, this easy baked version gives you crispy, restaurant-quality wings right from your oven.
What makes these wings truly special is the technique. Instead of relying on heavy breading or deep oil, the wings are coated in a simple blend of seasonings and baked at a high temperature until the skin turns beautifully crisp. The natural fat in the chicken renders in the oven, creating that crackly, crunchy texture everyone loves, while keeping the meat tender and juicy inside. You get the best of both worlds — crispy on the outside, perfectly cooked on the inside — with almost zero effort.
More breakfast ideas you’ll love
This method also gives you complete control over the flavor. Toss the wings in your favorite sauce — buffalo, honey garlic, barbecue, lemon pepper, teriyaki, parmesan garlic, or anything you love. Make them mild for kids, spicy for adults, or serve a tray with multiple flavors for parties or gatherings. They’re endlessly customizable, incredibly easy, and always a crowd favorite.
The best part? You only need a handful of ingredients and a baking sheet. No frying oil, no special tools, and no complicated steps. Just season, bake, flip, and enjoy. Once you try these crispy baked wings, you’ll never want to make them any other way. This recipe is simple, reliable, family-friendly, and ideal for anyone who wants delicious wings without the hassle.
Why You’ll Love These Crispy Baked Wings
If you love chicken wings but don’t love the hassle and heaviness of deep frying, these crispy baked wings will become your new go-to recipe. They offer everything you expect from restaurant-style wings — crunchy skin, juicy meat, bold flavor, and endless sauce possibilities — all without oil splatters, greasy cleanup, or extra calories. Baking wings at a high temperature allows the natural fat from the skin to render out, giving you a beautifully crisp exterior while keeping the inside tender and moist.
These wings are unbelievably easy to make and practically fail-proof. With just a few ingredients, one pan, and no special equipment, you can create wings that taste like they came straight from a sports bar. They’re perfect for game nights, family dinners, party trays, or weekend cravings. Whether you serve them plain, seasoned, or tossed in your favorite sauce, they always disappear fast.
Another major advantage is how customizable they are. Want them spicy? Add cayenne or buffalo sauce. Prefer something sweet? Try honey garlic or barbecue. Craving something bold and savory? Parmesan garlic or lemon pepper are excellent choices. This recipe gives you a crispy base that works with every flavor profile imaginable. Once you master this technique, you can make dozens of wing styles effortlessly.
Ingredients & Best Tips
Main Ingredients
-
Chicken wings (split into flats and drumettes)
-
Baking powder (aluminum-free)
-
Salt & pepper
-
Garlic powder
-
Paprika
-
Your choice of sauce (Buffalo, BBQ, honey garlic, lemon pepper, etc.)
Why Baking Powder?
It’s the secret to ultra-crispy oven-baked wings.
Baking powder raises the pH of the chicken skin, allowing it to brown faster and become crunchier — similar to frying, but without oil.
Best Tips for Perfect Wings
-
Use aluminum-free baking powder to avoid aftertaste.
-
Pat wings dry with paper towels to maximize crispiness.
-
Bake on a wire rack for extra airflow (optional but recommended).
-
Space wings apart so they crisp evenly.
-
Flip halfway through baking for even browning.
-
For extra crunch, broil for 2–3 minutes at the end.
How to Make Crispy Baked Wings (Step-by-Step)
Step 1: Prep the Wings
Pat chicken wings completely dry with paper towels.
The drier they are, the crispier they will become.
Step 2: Coat With Seasoning
In a bowl, toss wings with:
-
Baking powder
-
Salt
-
Pepper
-
Garlic powder
-
Paprika
Make sure every wing is evenly coated.
Step 3: Arrange on Baking Sheet
Place wings on a baking sheet lined with foil. Add a wire rack on top if you have one for optimal crispiness.
Step 4: Bake Until Crispy
Bake at 425°F (218°C) for 40–45 minutes, flipping halfway.
The wings should be golden, crisp, and sizzling.
Step 5: Sauce Them (or Serve Plain!)
Toss wings in your favorite sauce:
-
Buffalo
-
BBQ
-
Honey garlic
-
Teriyaki
-
Lemon pepper butter
-
Garlic parmesan
Or serve them plain with a dry rub — they’re delicious either way.
Flavor Variations
1. Classic Buffalo
Toss wings with melted butter + hot sauce + a splash of vinegar.
2. Honey Garlic
Mix honey, soy sauce, garlic, and a little butter.
3. BBQ Lover’s Wings
Use your favorite smoky or sweet barbecue sauce.
4. Garlic Parmesan
Toss in melted butter, minced garlic, parmesan, and parsley.
5. Lemon Pepper
Melt butter and mix with lemon pepper seasoning — simple and delicious.
6. Spicy Dry Rub
Combine chili powder, smoked paprika, cayenne, and garlic powder.
These variations allow you to create multiple flavors in one batch — perfect for parties.
Storage & Reheating
Refrigerator
Store leftover wings for 3–4 days in an airtight container.
Freezer
Freeze baked wings for up to 2 months. Reheat in the oven or air fryer.
Reheating Methods
-
Air fryer: 6 minutes at 375°F
-
Oven: 10 minutes at 400°F
-
Broiler: 2 minutes to re-crisp
Wings retain their crispiness best when reheated in dry heat—not the microwave.
What to Serve With Crispy Baked Wings
Pair wings with:
-
Celery & carrot sticks
-
Ranch dressing
-
Blue cheese dressing
-
French fries
-
Garlic bread
-
Mac and cheese
-
Onion rings
-
Loaded potato skins
Perfect for game day spreads or party appetizer tables.
Crispy Baked Chicken Wings
Ingredients
Method
- Preheat your oven to 425°F (218°C). Line a baking sheet with foil and place a wire rack on top if available.
- Pat the chicken wings completely dry with paper towels. Removing moisture helps them become extra crispy.
- In a large bowl, toss the wings with baking powder, salt, pepper, garlic powder, paprika, and olive oil (optional). Coat evenly.
- Arrange the wings in a single layer on the baking rack or baking sheet, leaving space between each wing.
- Bake for 40–45 minutes, flipping halfway through, until the wings are golden brown and crispy.
- Remove from the oven and let wings rest for 5 minutes.
- Serve as-is or toss immediately in your favorite sauce such as buffalo, BBQ, honey garlic, or garlic parmesan.
Notes
• The drier the wings, the crispier they become.
• For extra crunch, broil the wings for 2–3 minutes after baking.
• Air Fryer Option: Cook at 380°F (193°C) for 20 minutes, shaking halfway.
• Wings freeze well after baking—reheat in the oven or air fryer.
• Try different sauces to create multiple flavors in one batch. Approximate per serving: Protein 22g – Carbs 2g – Fat 20g
🔸 Recipe Times
- Prep Time: 10 minutes
- Cook Time: 45 minutes
- Total Time: 55 minutes
- Servings: 4
Final Thoughts
Crispy baked wings are one of the most satisfying dishes you can make at home — they’re easy, delicious, healthier than fried wings, and completely customizable. With just a few seasonings and the magic of high-heat baking, you get golden, crunchy wings that rival anything you’d order from a restaurant. The recipe is simple enough for beginners yet versatile enough for seasoned cooks who love experimenting with flavors.
These wings aren’t just a snack — they’re a crowd-pleaser that fits every occasion. Whether you’re hosting a party, preparing a sports-night feast, making a casual dinner, or satisfying a weekend craving, baked wings are always a reliable choice. They store well, reheat beautifully, and work perfectly with any sauce or seasoning you enjoy.
Once you try this method, you’ll never need to fry wings again. It’s cleaner, easier, healthier, and produces incredible results every single time. Crispy baked wings will quickly become a go-to recipe in your kitchen — a dish everyone looks forward to and one you’ll love making over and over.